|
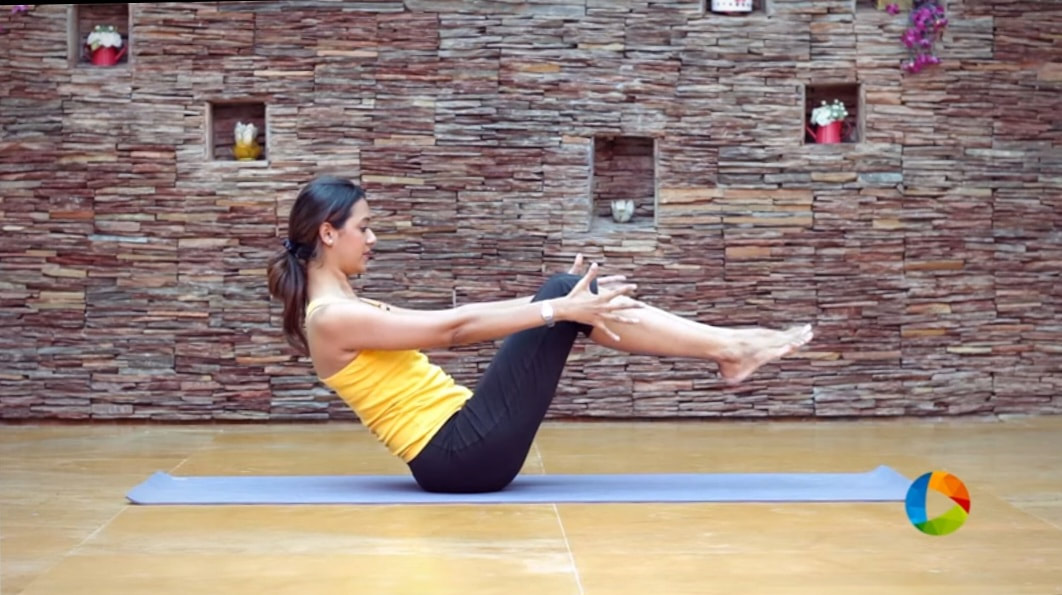
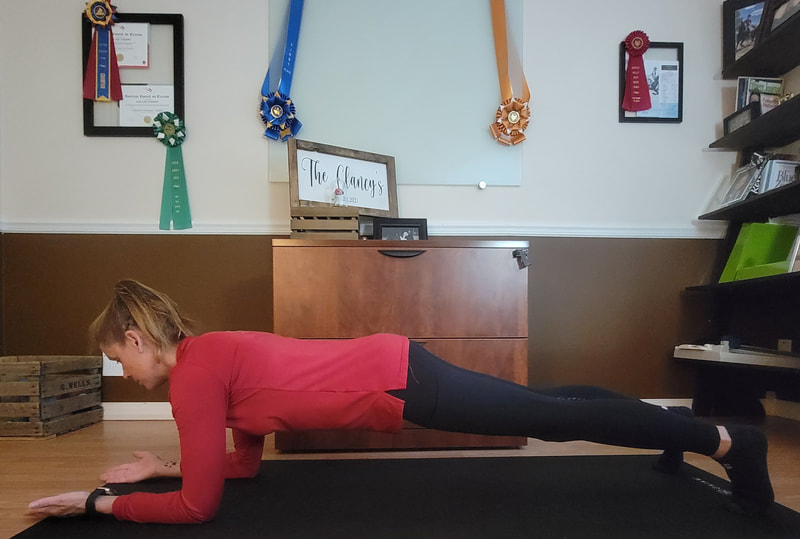
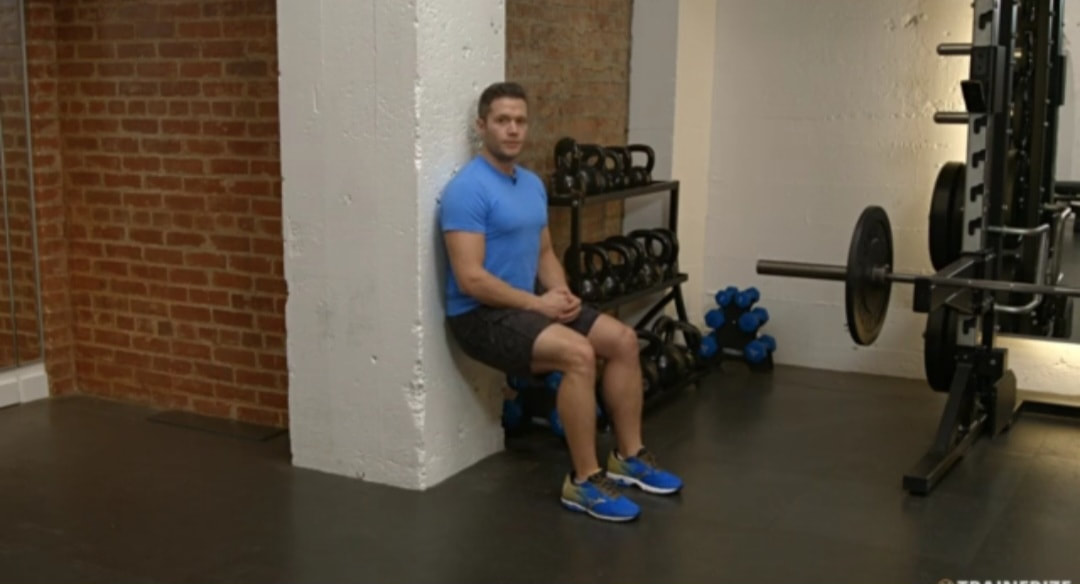
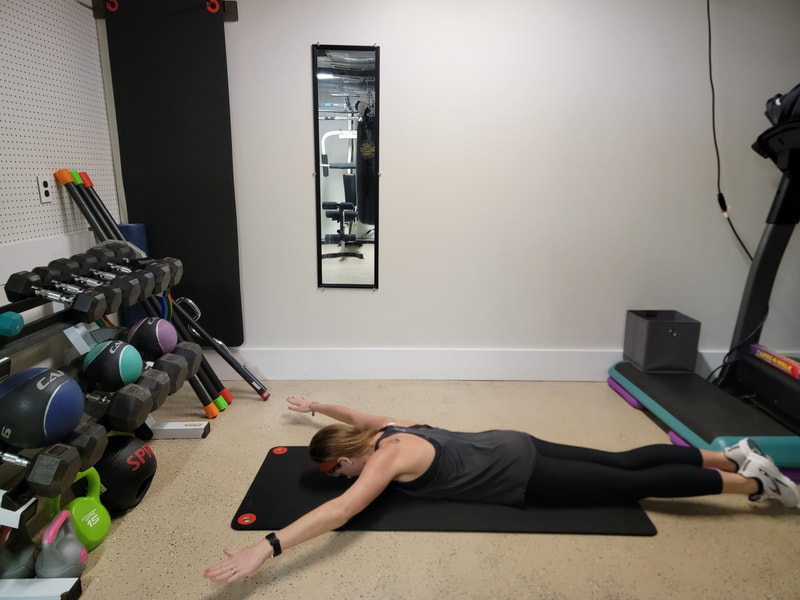
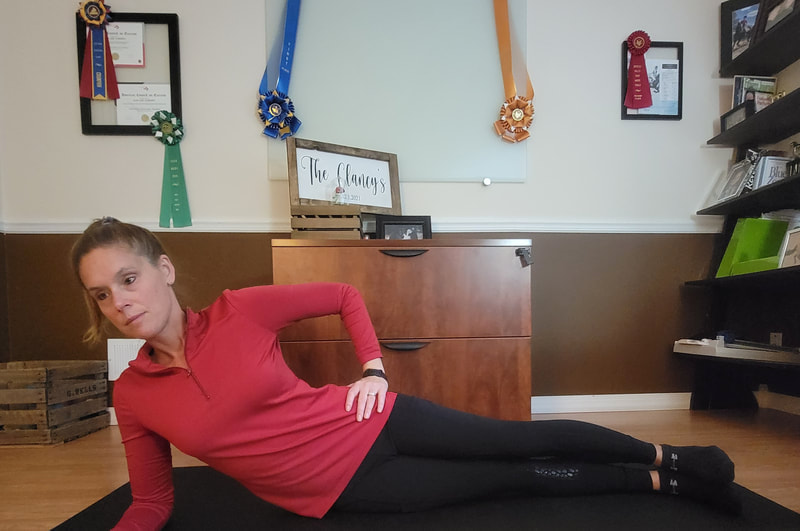
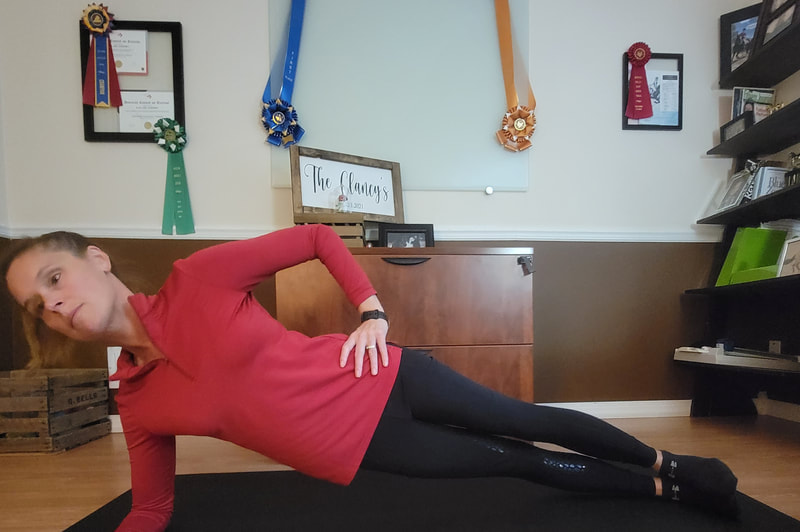
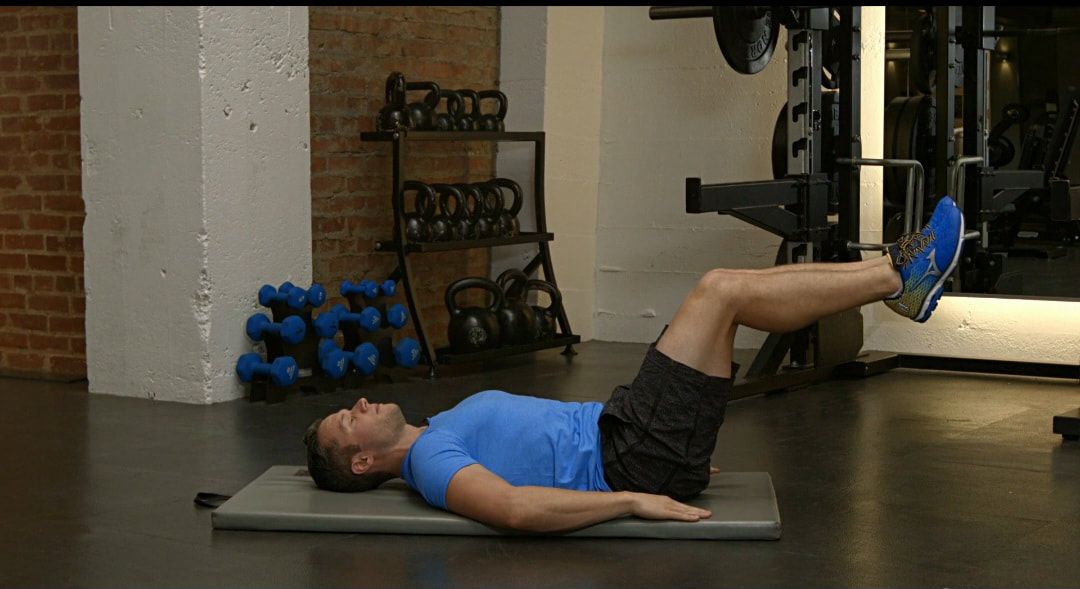
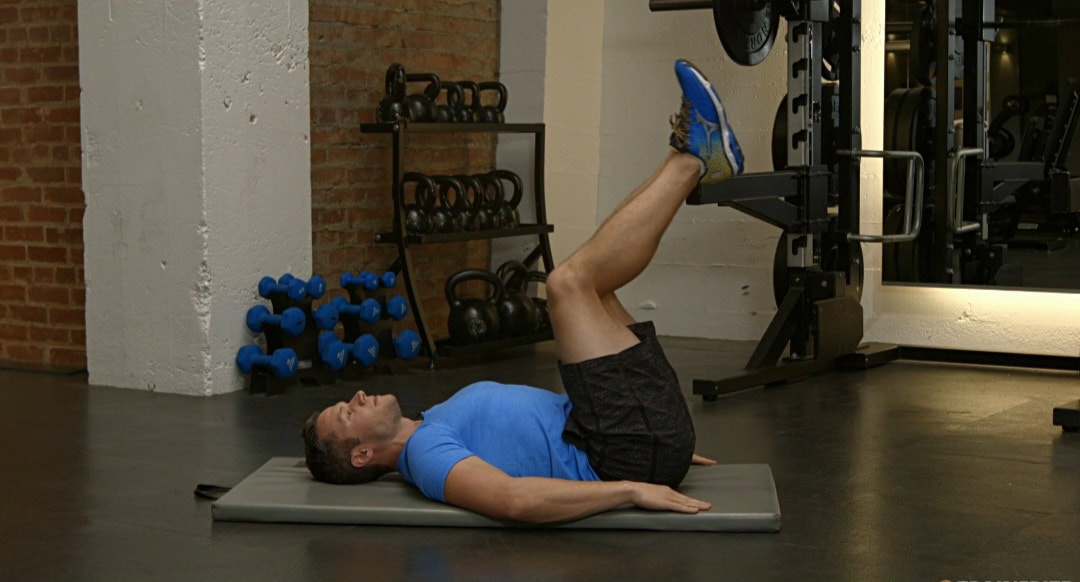
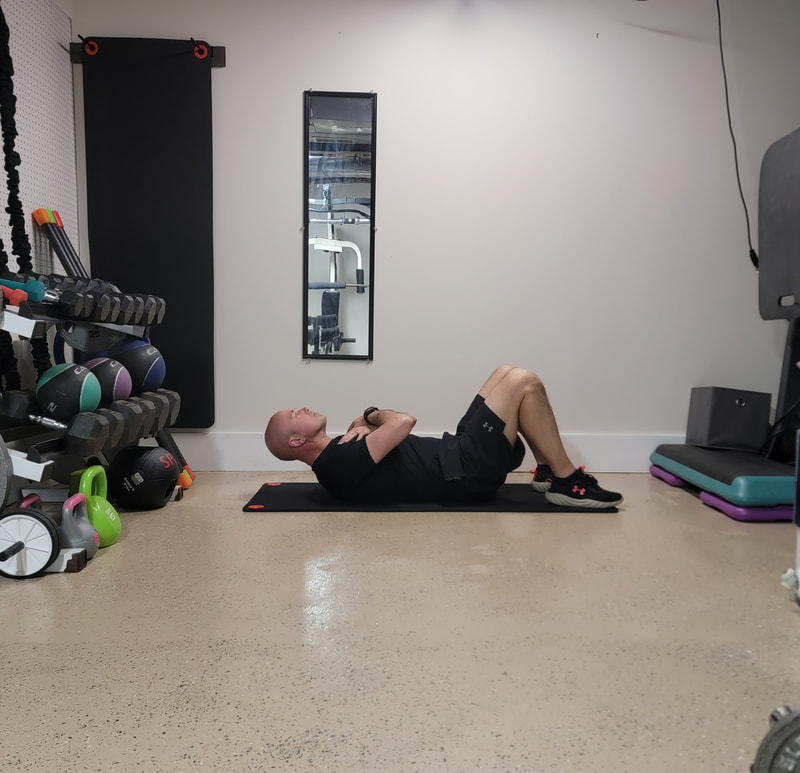
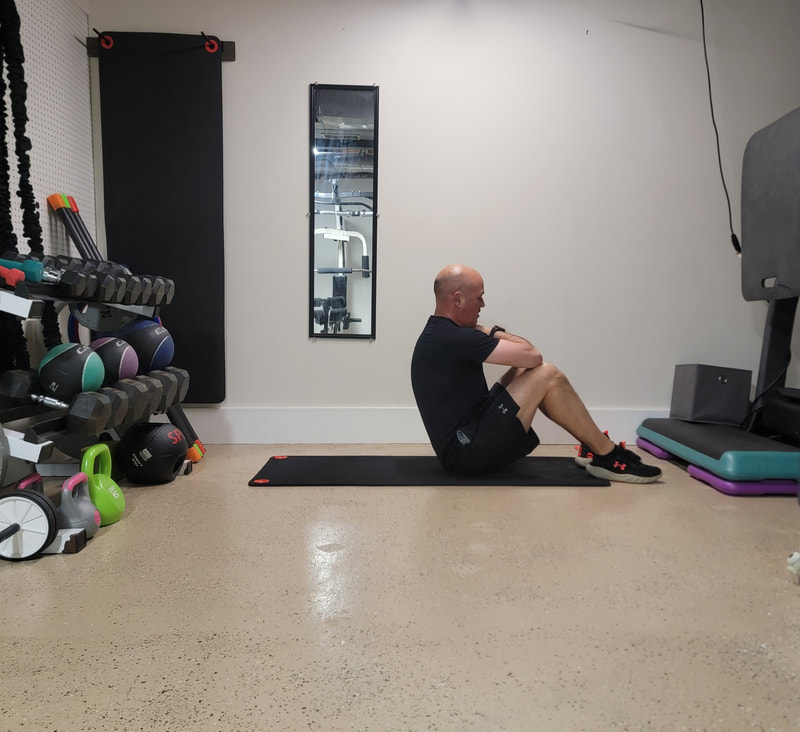
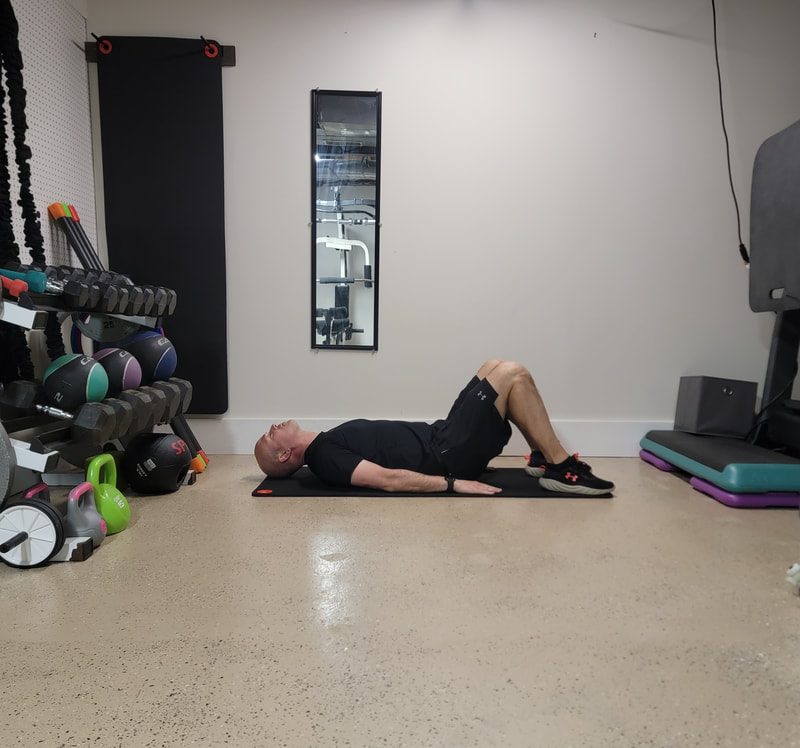
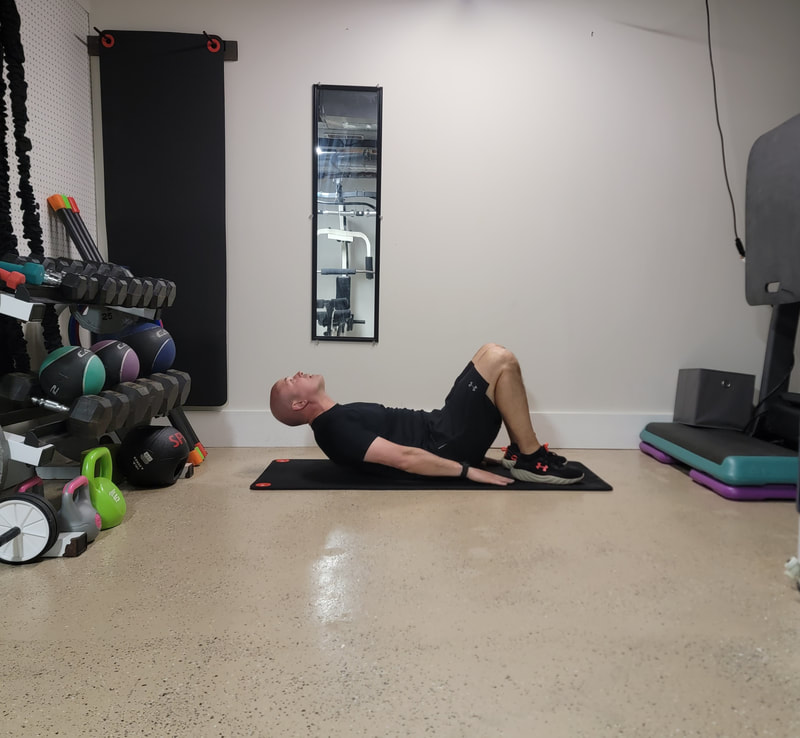
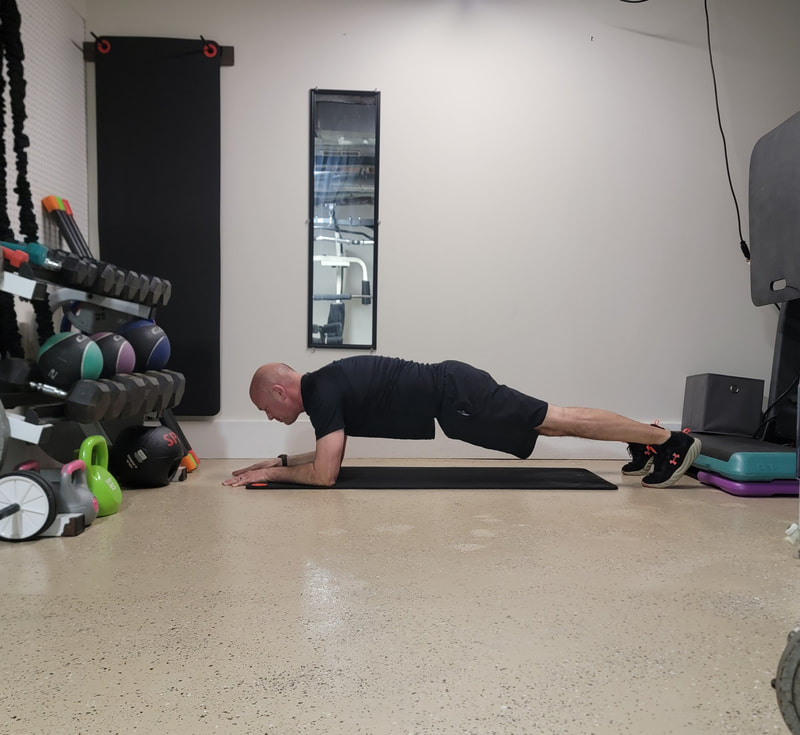
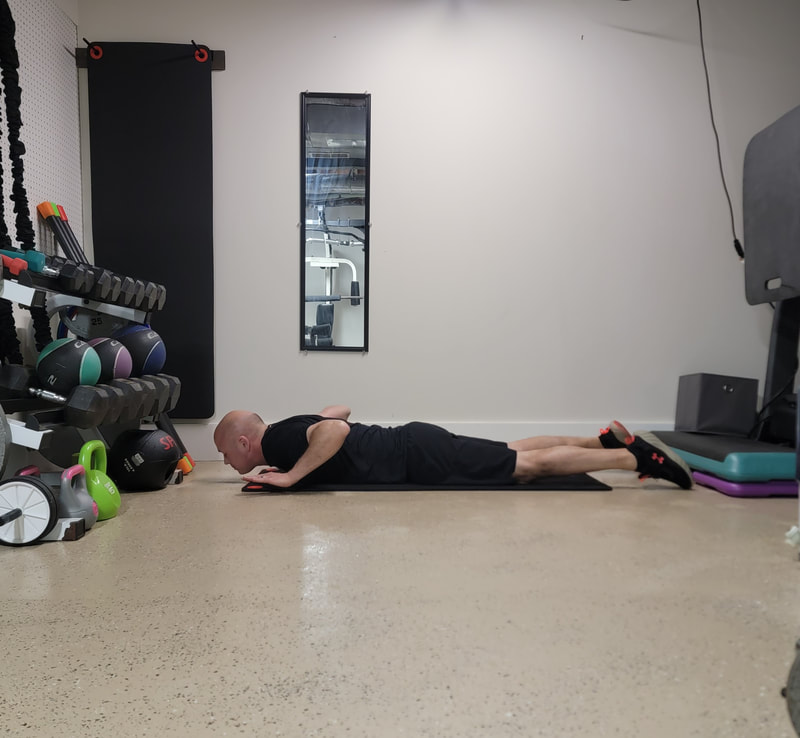
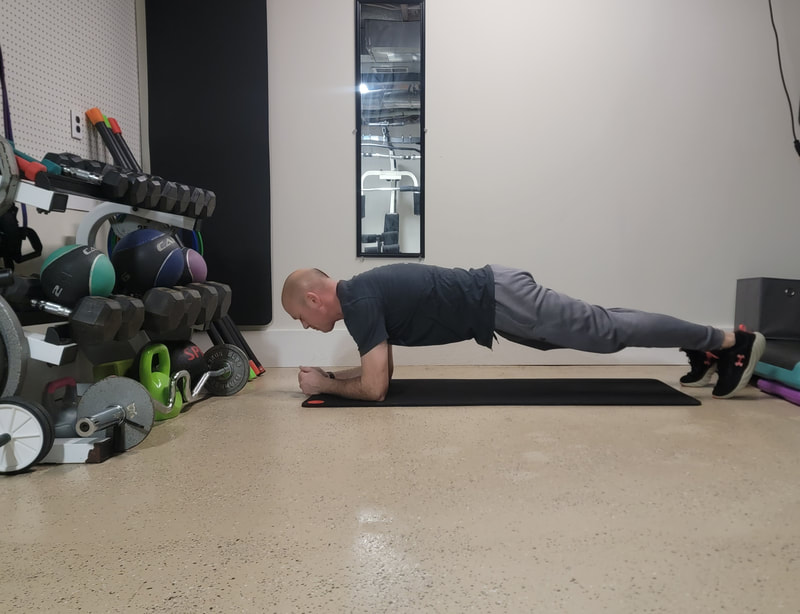
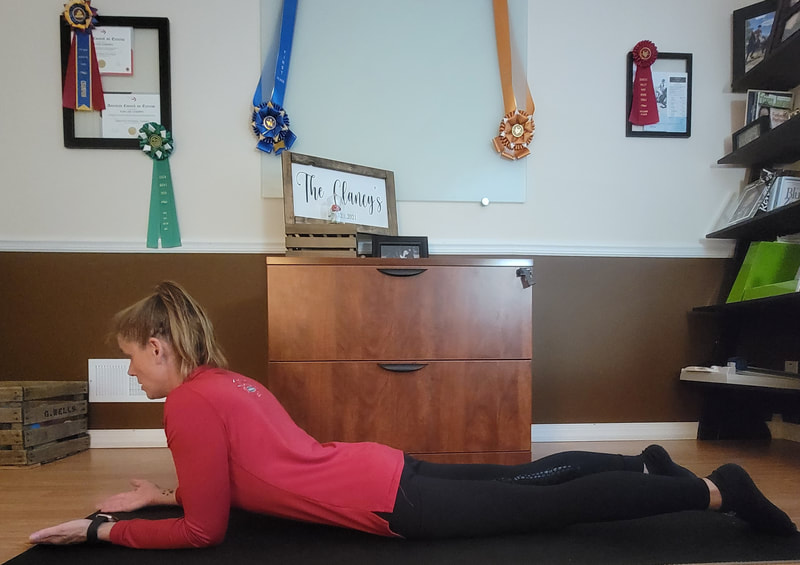
New Year Same Themed Workouts. 'Enjoy' This N.E.W. Y.E.A.R. Bodyweight 2024 Workout.. might as well call it a New Year AB Workout but .. We'll see what you think. Navasana - Boat Pose 1 set x 24 sec Elbow Plank 1 set x 24 Seconds Wall Sit 1 set x 24 Seconds Ys 1 set x Ys x 24 Elbow Side Plank 1 set x Left 24 Seconds Elbow Side Plank 1 set x Right 24 Seconds Ab Crunch 1 set x 24 Reverse Crunch 1 set x 24 Navasana Instructions 1. Sit on the floor with the knees bent and the heels touching the floor. 2. Cross your arms on the chest and keep them relaxed. 3. Hinge at the hips so that your torso leans back to a 30-degree incline (or lean back as far as possible while keeping the back straight). 4. You MAY Progress to "Full" Navasana Or Boat Pose if you feel comfortable. Elbow Plank Instructions: 1. Lie face down on a mat with elbows resting on the floor next to your chest, palms facing forward or in a fist position, feet together. 2. Push your body off the floor in a push-up position with your body resting on elbows or hands. 3. Contract the abs and keep the body in a straight line from head to toes. Hold for 30-60 seconds, then lower body returning to starting position. Wall SitInstructions: 1. When performing this exercise, ensure your knees don’t move forward past your toes. 2. Try to keep your knees at 90 degrees and hold. Y RaisesInstructions: 1. For this corrective exercise, it’s important to keep your shoulder blades back and down. It’s called scapular setting. 2. The “Y” is out at 45 degrees, again put your shoulder blades down. 3. To do this exercise, you lie down forward. 4. Set your shoulder blades and lift your arms above the ground. 5. Repeat. Elbow Side PlankInstructions: 1. When performing the side plank, ensure that your body is in a straight line and your supporting elbow is underneath your shoulder. 2. Squeeze your glutes to keep your hips forward in line with your body. 3. Once in position and you have a nice straight line down your body, hold.. Ab CrunchInstructions: 1. When performing this exercise, shorten the distance between the top of the pelvis and the bottom of your rib cage while rolling your rib cage up off the mat. 2. Be sure not to strain your neck by moving your head forward. 3. Repeat Reverse CrunchInstructions:
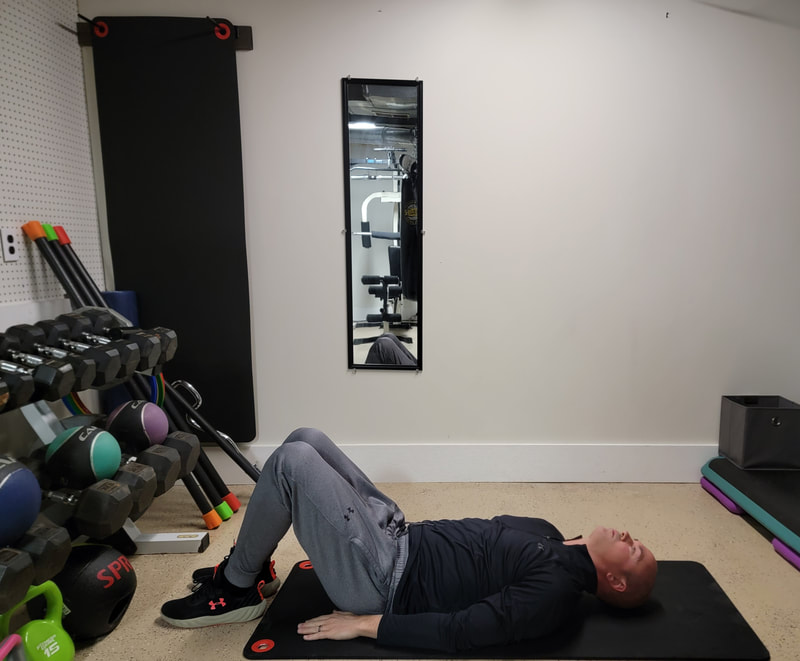
1. Lie on the floor and bend your knees so they are at 90 degrees. 2. Start by curling your hips off the floor and reach your legs up toward the ceiling. 3. Pause, and slowly return to starting position.
0 Comments
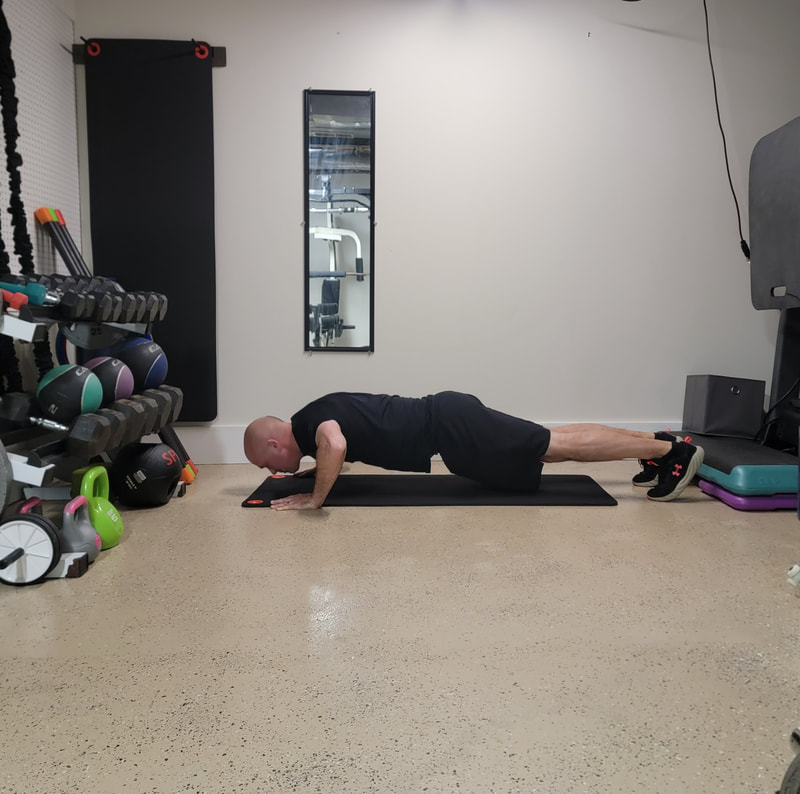
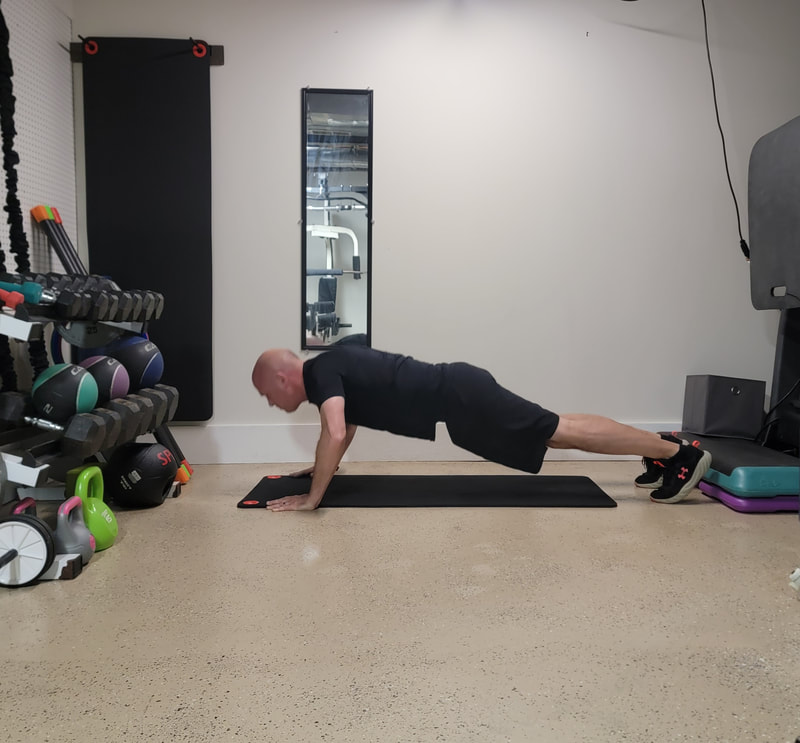
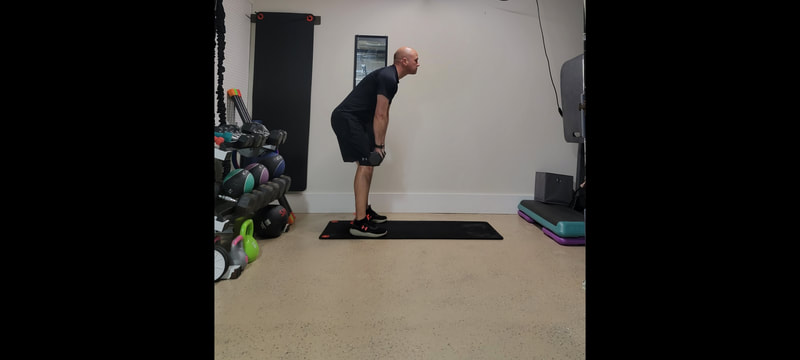
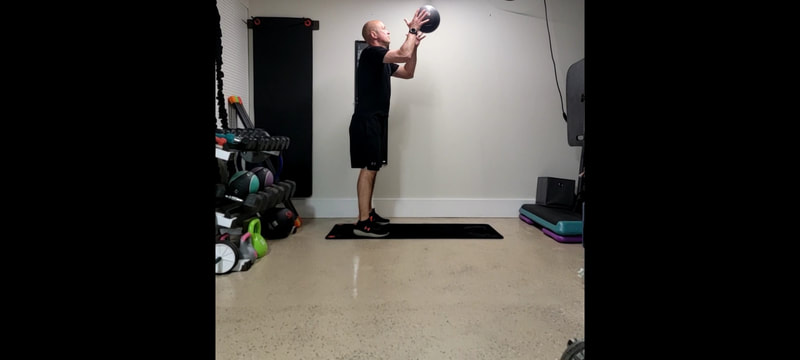
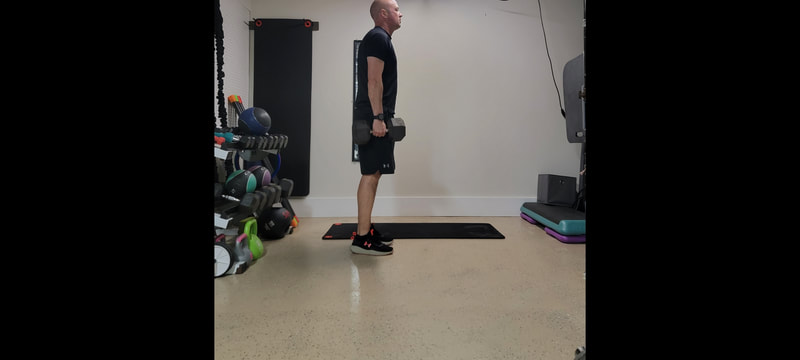
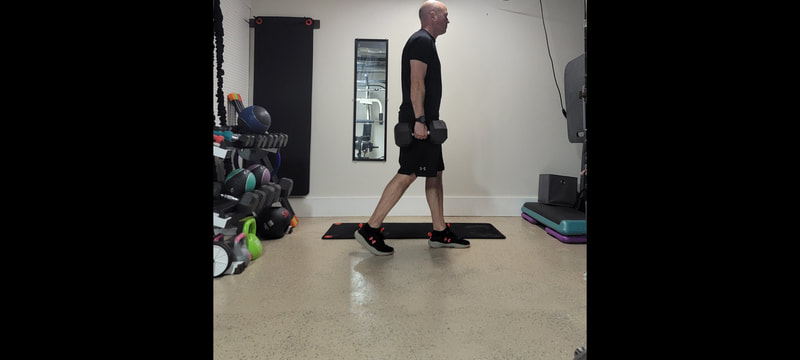
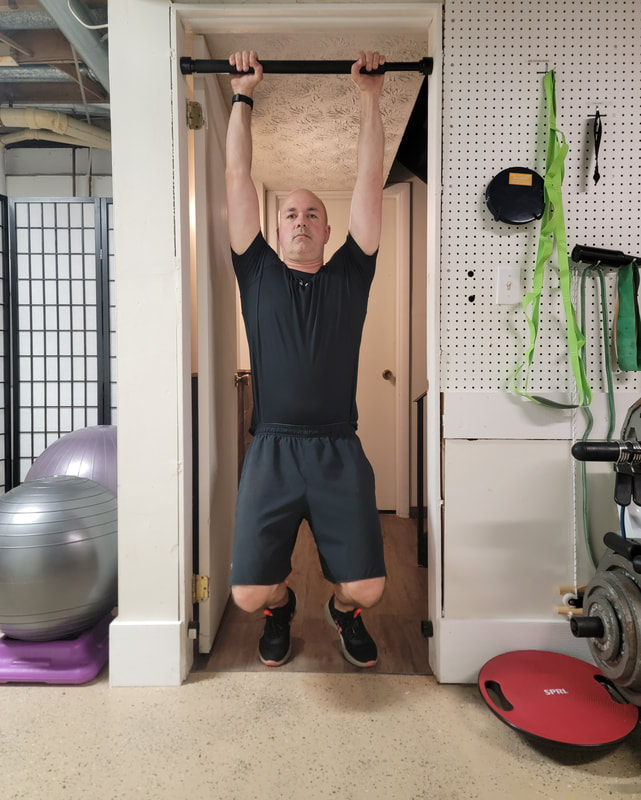
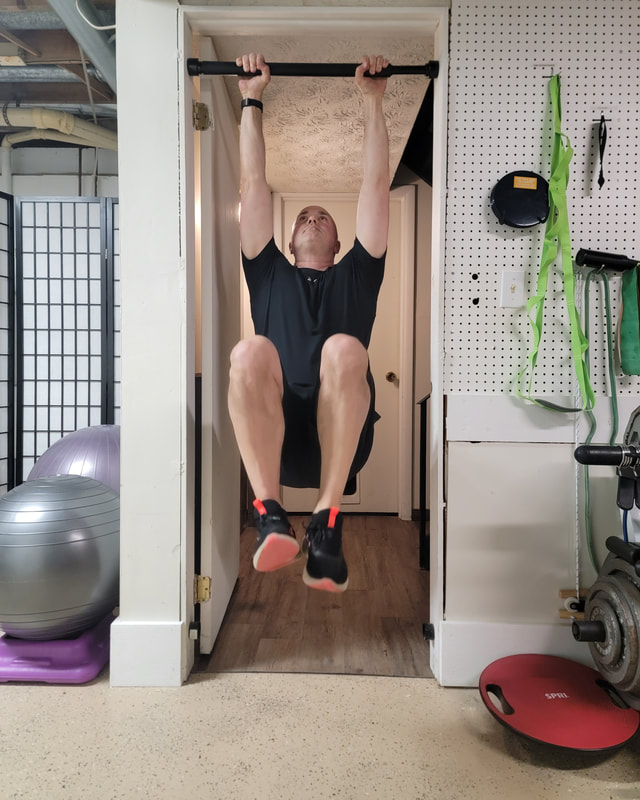
I can't remember exactly what inspired this workout.. perhaps the fact that I have a military family? The following workout is a collaboration of the different military branches and their required physical fitness test exercises, minus the cardio. Circuit of 3 rounds Push Up 15 Sit Up 15 Repeat new round Circuit of 1 round Push Up 1 set x 14 Ab Crunch 1 set x 15 Push Up 1 set x 13 Elbow Plank 1 set x 30 Seconds Hand-release Push-up 1 set x 12 Dumbbell Deadlift 1 set x 15 Medicine Ball Squat & Throw 1 set x 15 Farmer Walk 1 set x On Treadmill For 0.02 Miles Hanging Leg Raise 1 set x 15 Push-upInstructions: 1. Lie with your chest facing down, palms flat on the floor and slightly more than shoulder-width apart, your feet should be together and your legs straight. 2. Push your body upwards and straighten your arms. 3. Lower your body returning to starting position. 4. Repeat. Sit UpInstructions: 1. Lie on your back on the floor with your feet shoulder width apart. 2. Begin by lifting your upper body up until you are sitting up straight with your arms either at your sides, crossed in front of you, or behind your head. 3. Lower your body back to the floor. 4. Make sure that you do not use your arms to swing your body up and make sure that your feet remain touching the ground at all times. Ab Crunch Instructions: 1. Lie on your back on the floor with your feet shoulder width apart. 2. Begin by lifting your upper body up until you are sitting up straight with your arms either at your sides, crossed in front of you, or behind your head. 3. Lower your body back to the floor. 4. Make sure that you do not use your arms to swing your body up and make sure that your feet remain touching the ground at all times. Elbow Plank Instructions: 1. Lie face down on a mat with elbows resting on the floor next to your chest, palms facing forward or in a fist position, feet together. 2. Push your body off the floor in a push-up position with your body resting on elbows or hands. 3. Contract the abs and keep the body in a straight line from head to toes. Hold for 30-60 seconds, then lower body returning to starting position. 4. Repeat. Hand-release Push-upInstructions: 1. Lie with your chest facing down, palms flat on the floor and slightly more than shoulder-width apart, your feet should be together and your legs straight. 2. Push your body upwards and straighten your arms. 3. Lower your body returning past the starting position, fully resting your chest on the floor, lift both hands off of the floor. 4. Repeat. Dumbbell Deadlift Instructions: 1. Stand and hold two dumbbells with palms facing in. 2. With your back straight and knees locked, bend your body at your waist and lower down to the floor. 3. Then straighten up while still holding the dumbbells at arms length. This is a very difficult exercise and is not meant for beginners. Medicine Ball Squat & Throw Instructions: 1. Holding the ball with both hands, just under the chin and against your chest, take a squat, feet about shoulder-width apart. 2. Stand straight keeping legs straight, as you do this, throw the ball up. 3. Return to a squat position, as you do this, catch the ball. 4. Repeat. Farmer WalkInstructions: 1. Stand upright holding dumbbells with your arms straight by your sides. 2. Walk forward as far as you can while holding the dumbbells. 3. Move for a given distance, typically 50-100 feet, as fast as possible. Hanging Leg Raise Instructions:
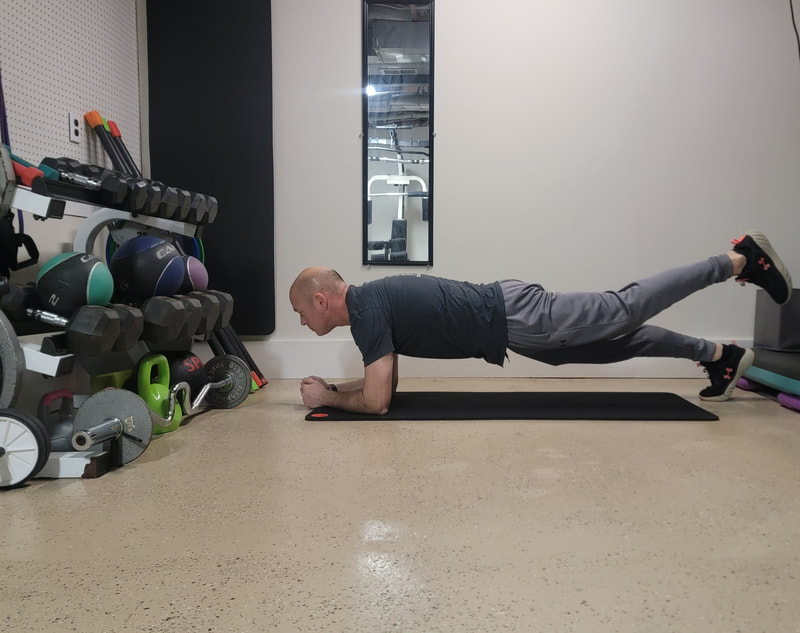
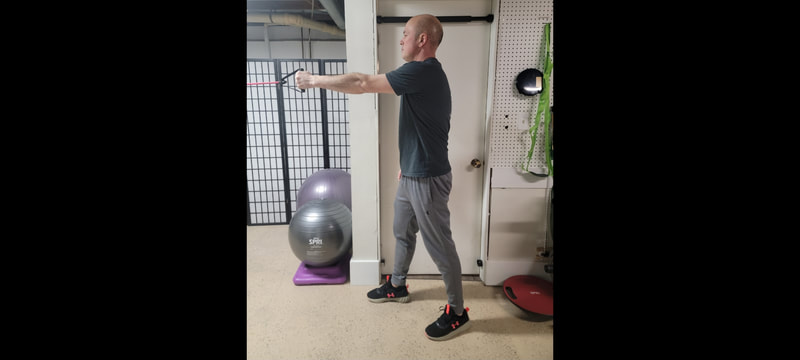
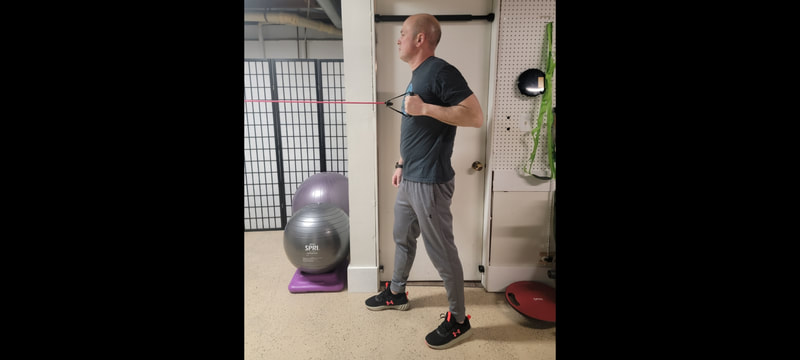
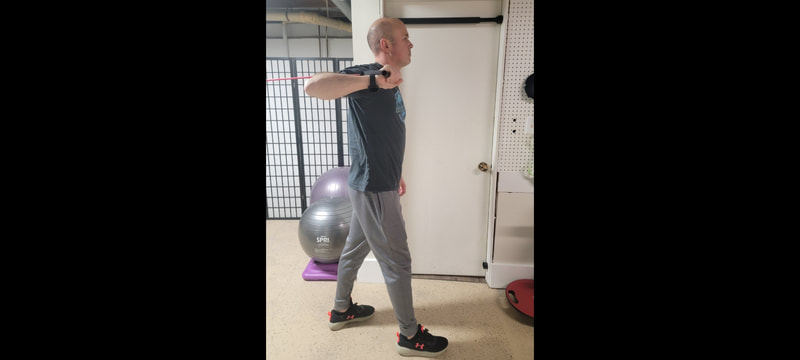
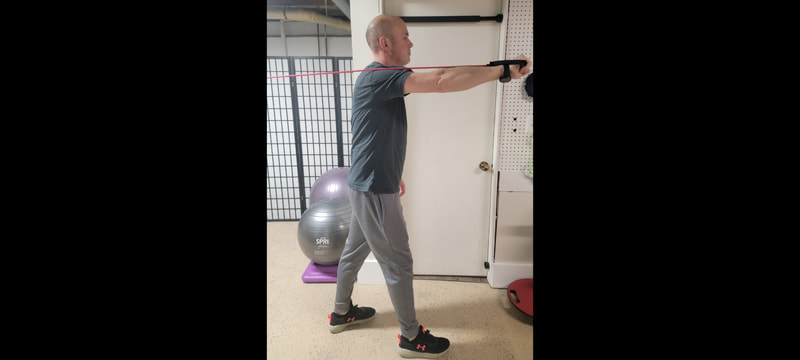
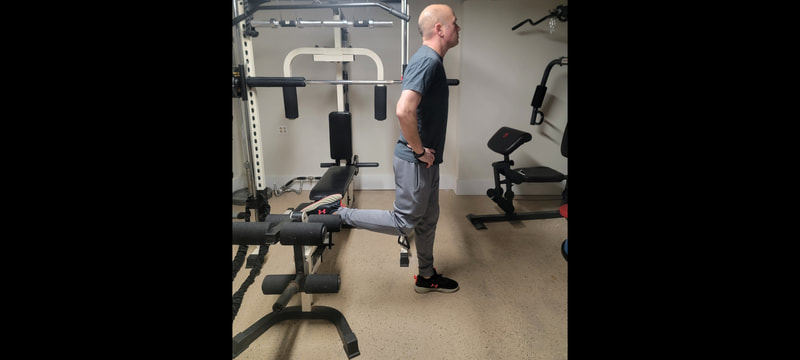
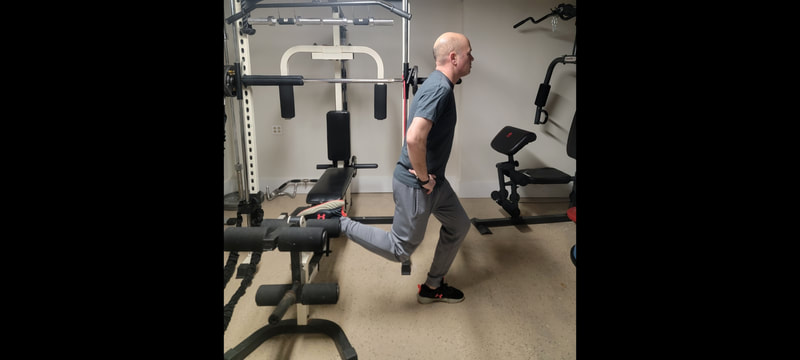
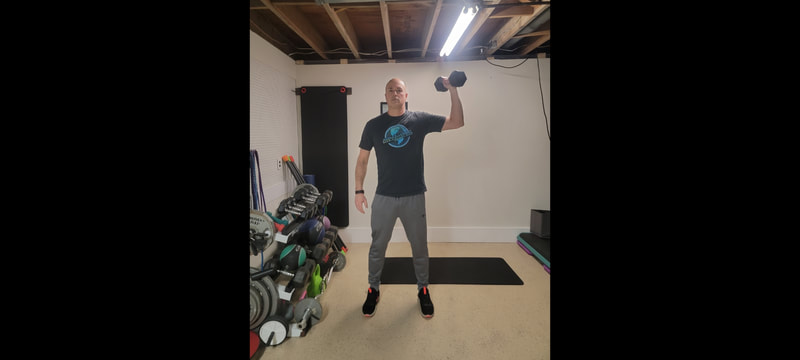
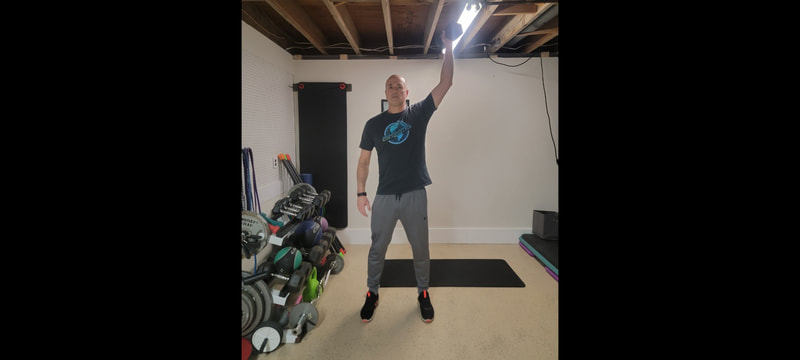
1. Hang from a pull-up bar. 2. Start by using your abs to bring your knees up until your waist. Pause, and slowly return to the starting position. 3. Repeat. Ahh… Mud is in the air. Well, for dog & horse owners. For normal people, spring is in the air. As the winter season changes to the spring season, we are gifted the opportunity for new beginnings, new routines, and optimistically even more time outside. As we begin spring cleaning here are a couple of tried and true exercises that volunteer as tribute to be swapped out. Plank Challenges There is nothing more cringy than a plank challenge. One of my colleagues said it best, “If someone challenges you to hold a plank for minutes, say ‘No!’” and then run away. It’ll be good for your step goals. Alternating Elbow Single Leg Plank Instructions: 1. Raise your body off the floor on your elbows, resting on your toes. 2. Raise one leg straight up off the floor, keeping your body in a straight line and your back neutral/flat. 3. Hold briefly, then lower back your leg to the floor returning to starting position. 4. Raise the opposite leg. Alternate sides with each rep. Seated Back Row The Seated back row is one of the most effective back exercises, however, anytime you perform an exercise seated that could be performed standing, you miss the opportunity to train the core and hip muscles. By switching to a Single-arm Standing Back Row, you ask the spinal stabilizers of your core and your hips to work harder to keep your body stable as you pull the weight towards you. Single-arm Standing Back Row 1. Stand holding the handle in one hand with your arm straight out in front, your palm facing in and your back flat. 2. Pull the handle straight in to your chest. 3. Return to starting position. Remain upright throughout and do not sway back and forth or twist your wrist. 4. Complete all reps on one side before switching to the other side. The Bench Press The bench, or floor, depending on what equipment you have access to, can limit the motion of the shoulder joints. Switching to the Cable, (or band,) Press, standing or kneeling, engages the abdominal aspect of your core to stabilize your spine while pressing the weight. Cable, (Band) Press Instructions: 1. Kneel on one knee, or stand, facing away from a cable system, or anchor point, holding the rope, or band, in the hand on the same side, elbow bent. 2. Press forward, arm straight. 3. Bend at the elbows returning to starting position. 4. Complete all reps on one side before switching to the other side. The Lunge I love a good lunge, but let’s talk about the Bulgarian Split Squat. I know some of my clients are shuddering as they read this.. BUT The Bulgarian Split Squat demands more of each, individual leg because more of your body weight is balanced on one leg. This in turn asks more of .. you guessed it - your core! Bulgarian Split SquatInstructions: 1. When performing this exercise, ensure that your knee, feet, and hip are in line. 2. With your feet hip-width apart, place the instep of your rear foot on a bench. Your feet should be approximately three feet apart. 3. Lower your hips toward the floor so that your rear knee comes close to the floor. 4. Pause and drive through your front heel to return to the starting position. 5. Repeat and then switch sides. The Shoulder Press By simply switching to a Single Arm Overhead Press we are once again asking more of not only our core, but our hips to drive the movement upwards. Single Arm Overhead Press Instructions:
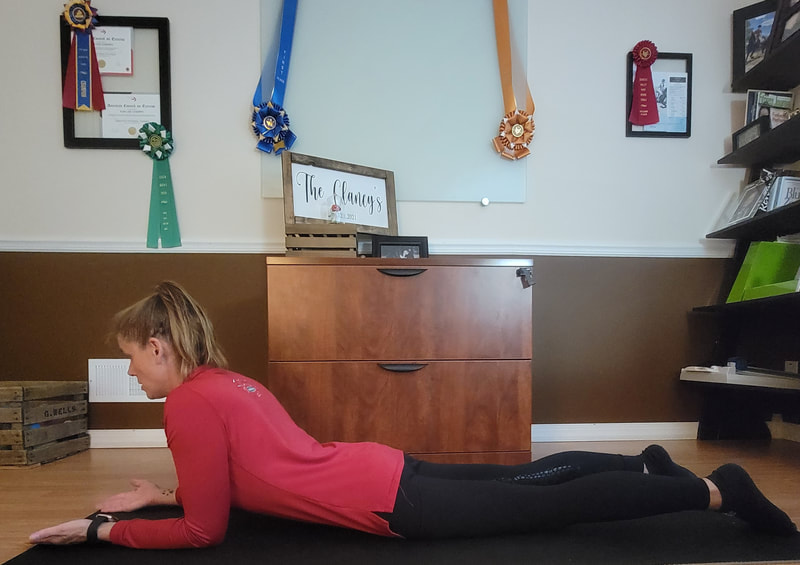
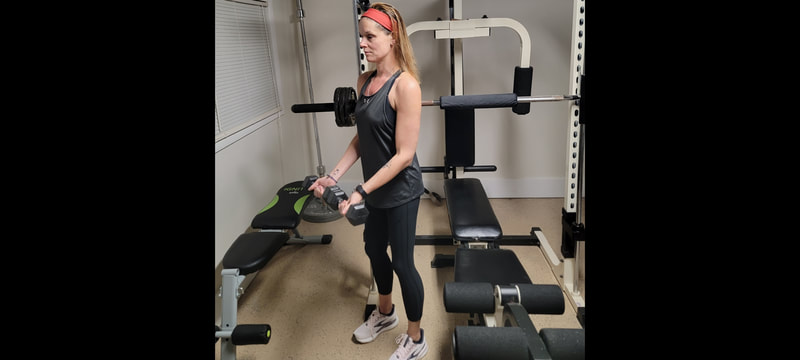
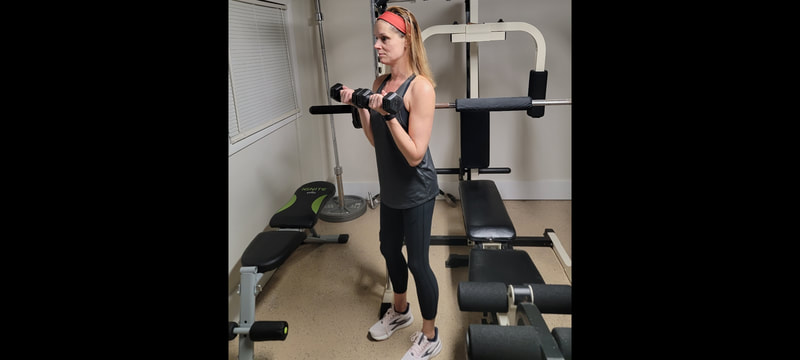
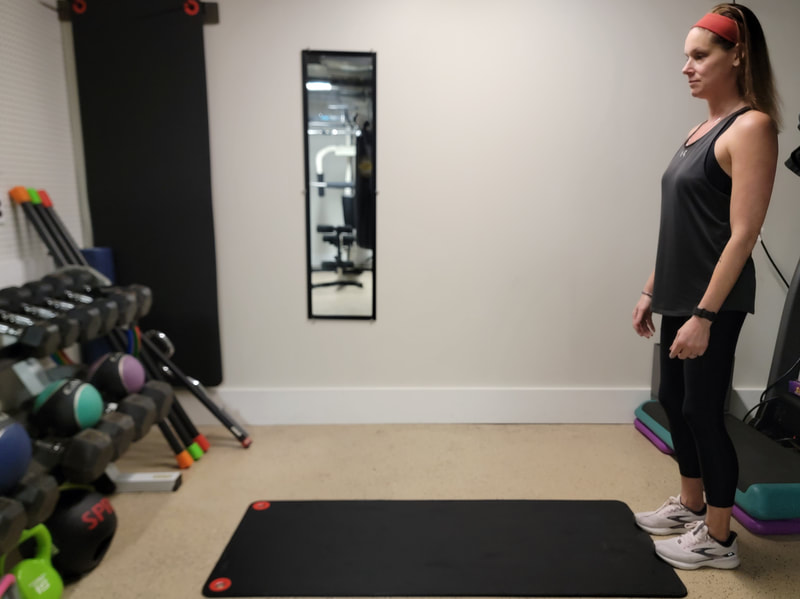
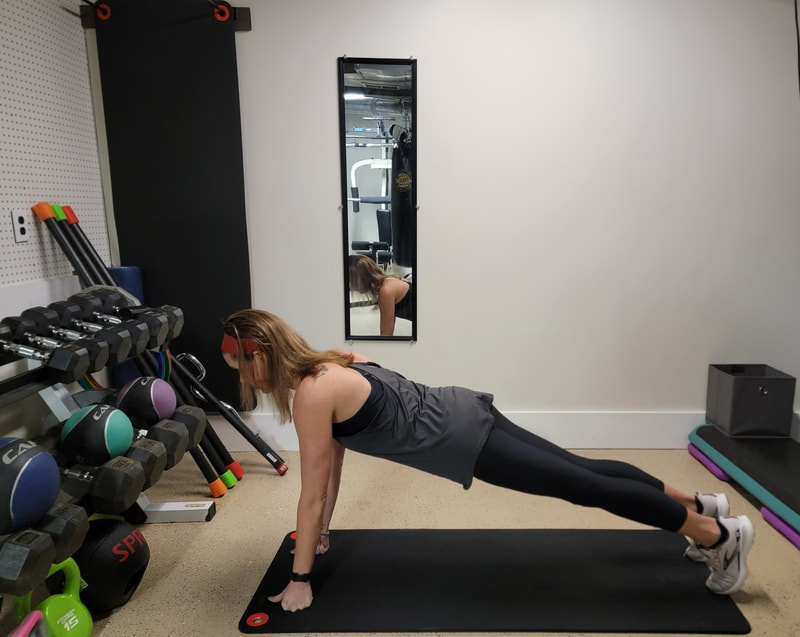
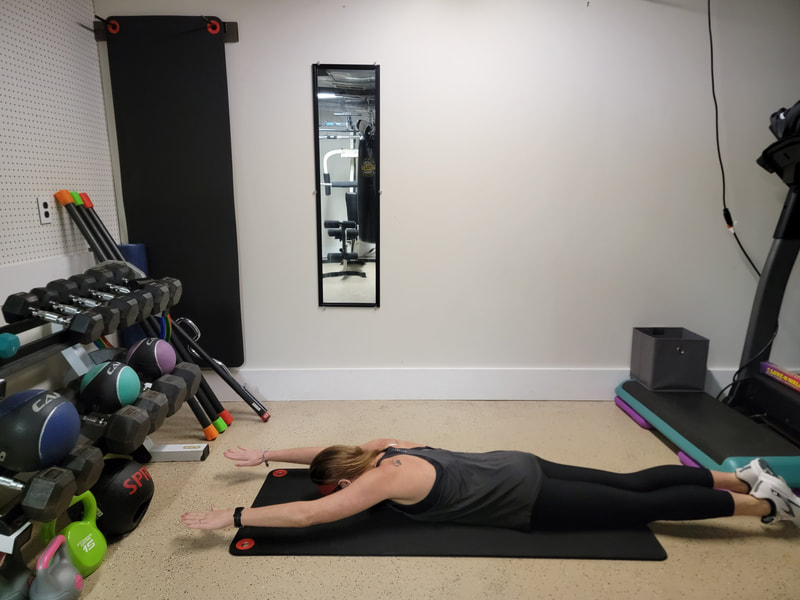
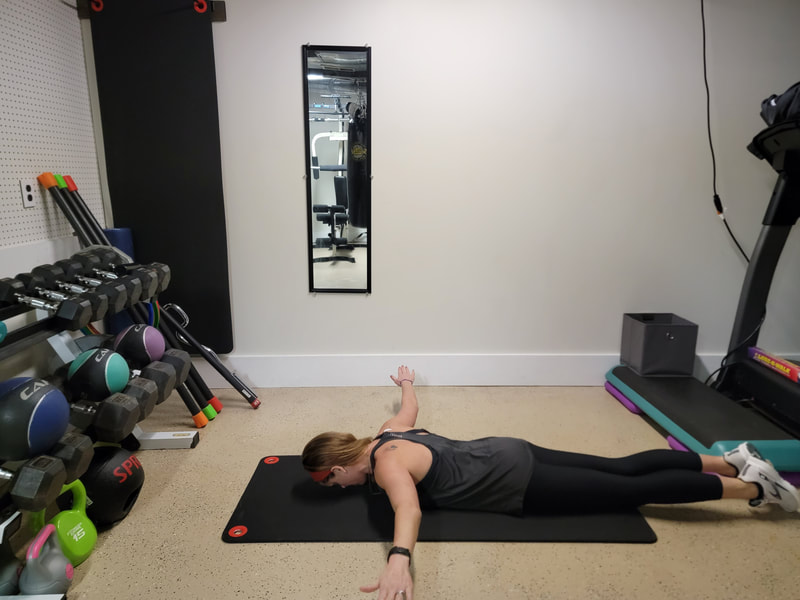
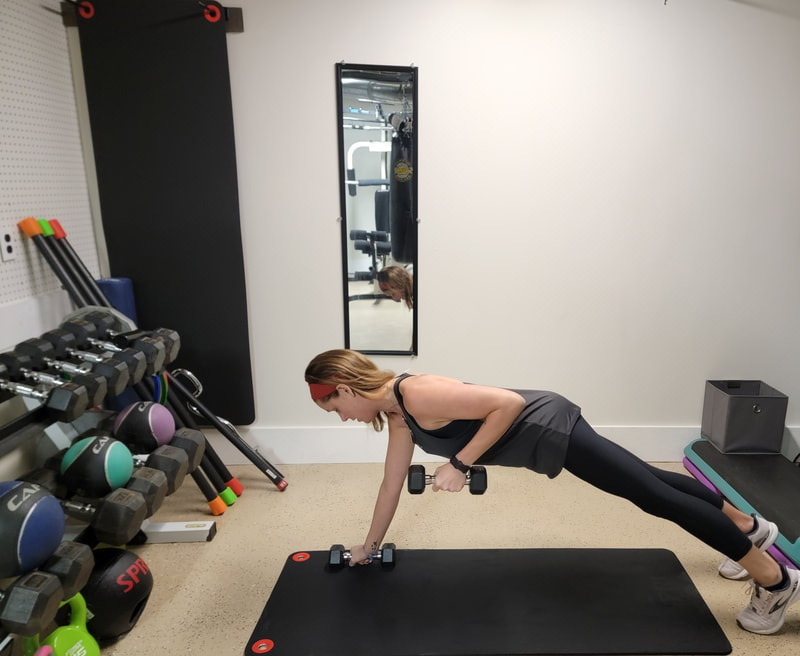
1. Stand upright holding a dumbbell on one hand at shoulder height, fist away from you. 2. Press the dumbbell overhead, fully extending your arm. 3. Keep your back flat and remain upright throughout. 4. Complete all reps on one side before switching to the other side. Try incorporating some of these into your next workout, your body will thank you. As always, any questions just DM Me. Happy to help. As my clients know I love a good themed workout. Enjoy, or don't, this year's NEW Year Workout...each and every single one of the 23, yes, 23 repetitions. Hate it? Love it? Leave a comment. Narrow Grip Bicep CurlInstructions: 1. Placing your hands closer together on a barbell, or holding your bands or dumbbells as close as possible, set your knees with a soft bend, hips back and chest up while you perform the bicep curl. 2. Keep your elbows tucked in while curling. Repeat 23 times. Elbow PlankInstructions: 1. Lie face down on a mat with elbows resting on the floor next to your chest, palms facing up or in a fist position, feet together. 2. Push your body off the floor in a push-up position with your body resting on elbows or hands. 3. Contract the abs and keep the body in a straight line from head to toes. Hold for 30-60 seconds, then lower body returning to starting position. Hold for 23 seconds. Walk OutsInstructions: 1. Start by standing with feet shoulder-width apart. 2. Reach your hands down towards the mat, and slowly walk your hands all the way out to a plank position. 3. While keeping your hips in line, and abdomen tight, walk your hands all the way back up to the standing position. Repeat 23 times. Ys, Is, & TsInstructions: 1. For this corrective exercise, it’s important to keep your shoulder blades back and down. It’s called scapular setting. 2. The “Y” is out at 45 degrees, again put your shoulder blades down. 3. The “I” position is the most challenging, it’s straight up overhead. 4. “T” is at 90 degrees shoulder blades down. 5. To do this exercise, you lie down forward. 6. Set your shoulder blades and lift your arms above the ground. 7. Pick the one that’s suited for you and your capacity to hold your shoulder blades in place. Repeat 23 times. Elbow Side Plank Instructions: 1. When performing the side plank, ensure that your body is in a straight line and your supporting elbow is underneath your shoulder. 2. Squeeze your glutes to keep your hips forward in line with your body. 3. Once in position and you have a nice straight line down your body, hold for 23 Seconds. Ab CrunchInstructions: 1. When performing this exercise, shorten the distance between the top of the pelvis and the bottom of your rib cage while rolling your rib cage up off the mat. 2. Be sure not to strain your neck by moving your head forward. Repeat 23 times. Renegade Push Up Row Instructions:
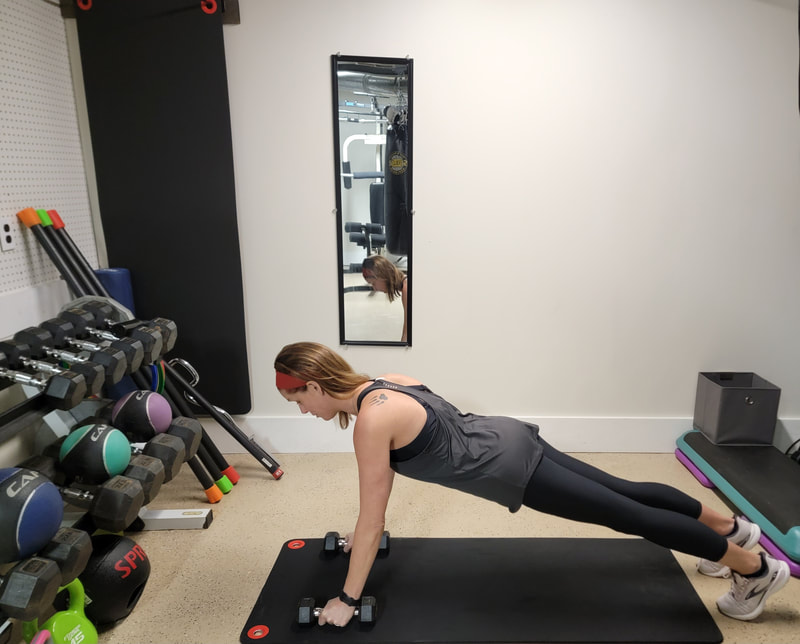
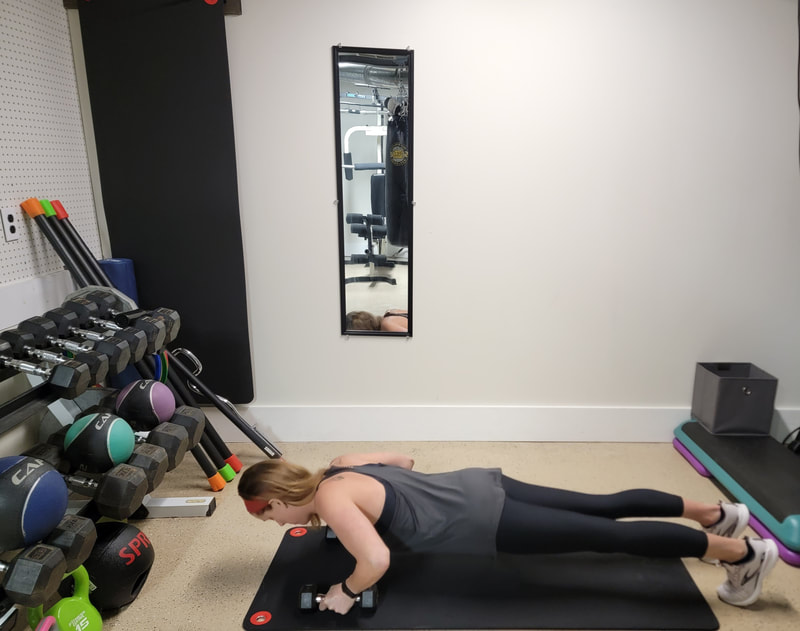
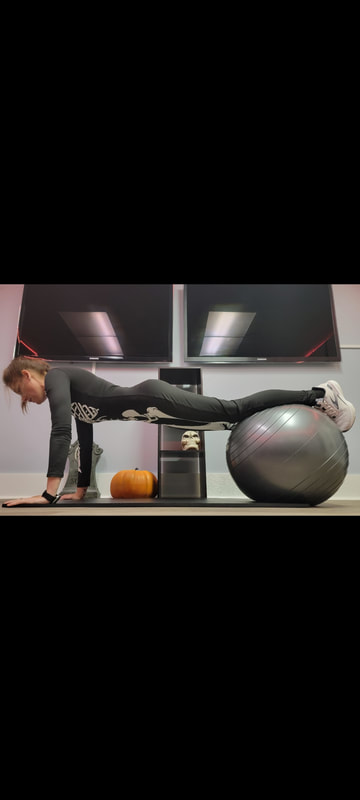
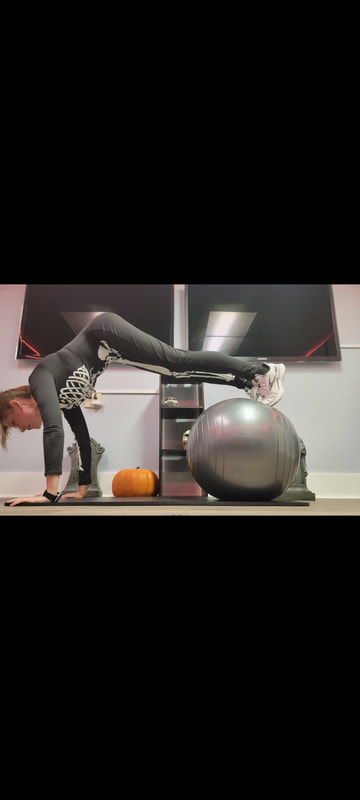
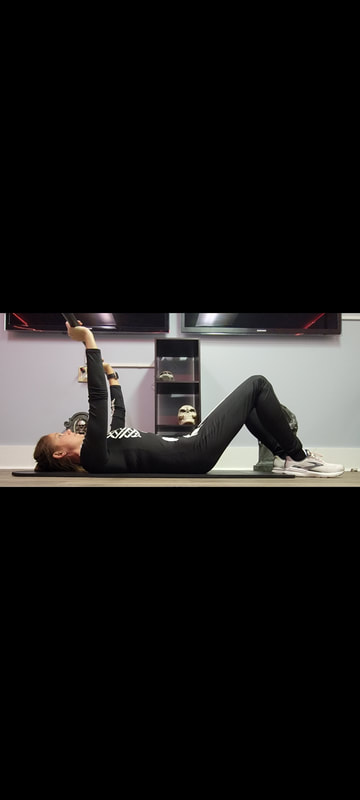
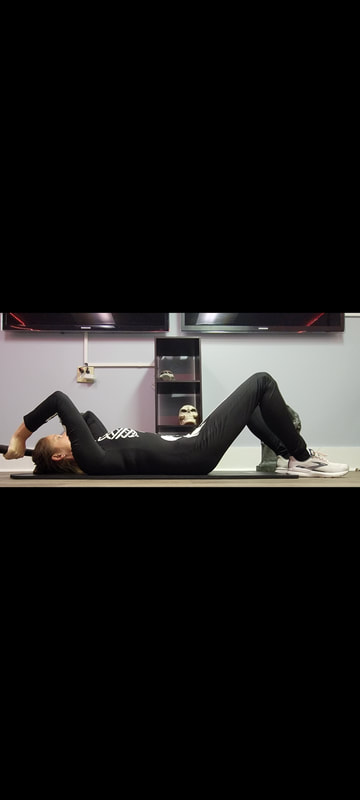
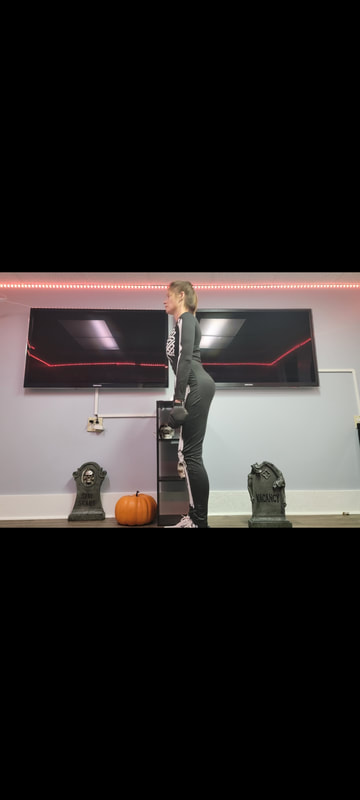
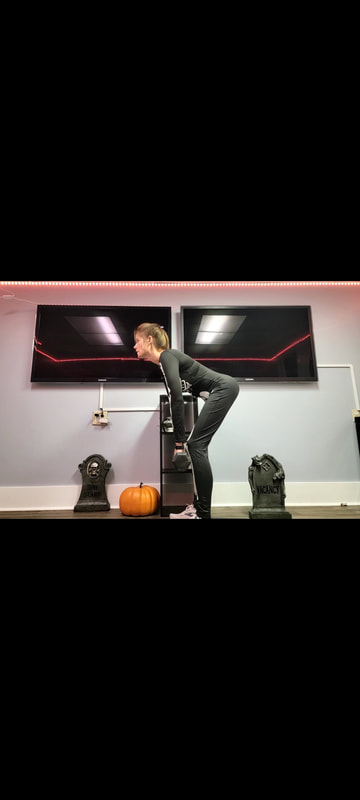
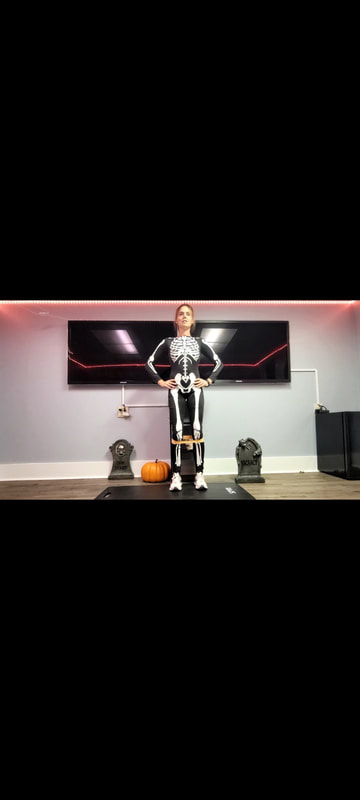
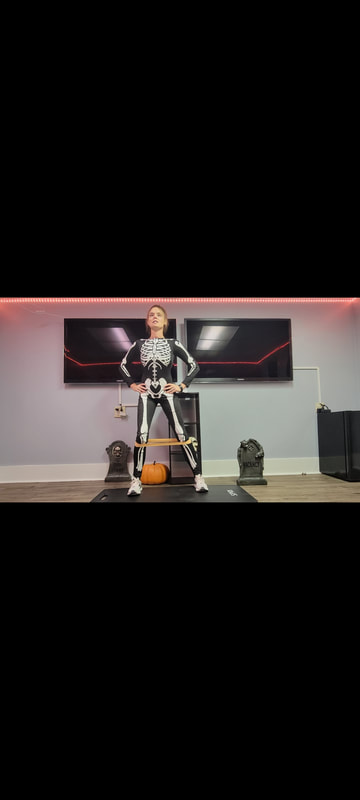
1. Get into the top position of the push-up, holding on to a dumbbell in each hand with arms shoulder-width apart, arms straight. 2. Lower your body with chest touching the floor. 3. Push your body upwards and straighten your arms. At the top, pull one dumbbell off the floor and push your elbow back, contracting your shoulder blades. 4. Return to starting position. Repeat 23 times and alternate. The scary part about this workout is how bad!ss you'll feel afterwards. A stability ball, barbell or dumbbells and a mini band is all you need for this killer workout. <--See what I did there? Coach by day, comedian by night. Many of these pieces of equipment, costume included, can be found on Amazon.com. I don't get paid endorse Amazon but I should. For my clients I am able to purchase all fitness equipment directly through the retailers at cost for you. As always, any questions on how to torture yourself more just DM Me. Happy to help. Stability Ball Jack Knife Instructions: 1. Start in push-up position, but with your shins on a fitness ball. 2. Your body should form a straight line from ankles to head. 3. Without rounding your lower back, contract your abs and use your feet to pull the ball toward your chest by bending your knees. 4. Pause, and return to the starting position. Repeat 13 times. Barbell SkullcrusherInstructions: 1. Start by pressing up the barbell with your grip less than 12 inches apart. 2. Slowly lower the barbell towards your head, pause, and raise the barbell again. Repeat 13 times. Dumbbell DeadliftInstructions: 1. Stand and hold a barbell or one or two dumbbells with palms facing in. 2. With your back straight and knees locked, bend your body at your waist and lower down to the floor. 3. Then straighten up while still holding the dumbbells at arms length. This is a very difficult exercise and is not meant for beginners. Repeat 13 times. Mini Band Monster WalksInstructions:
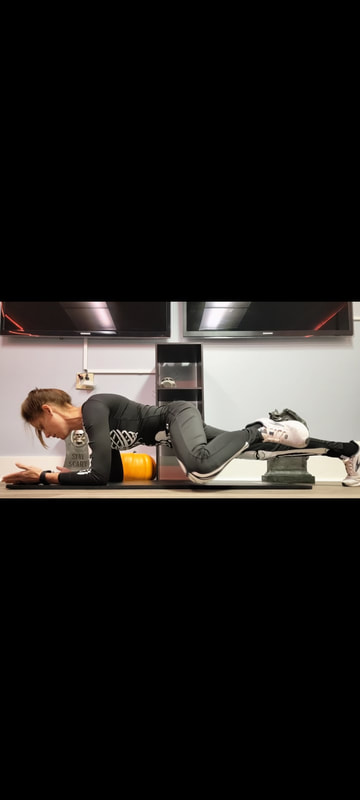
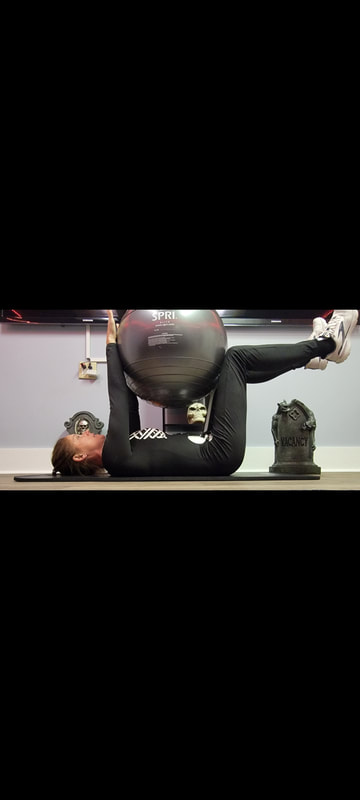
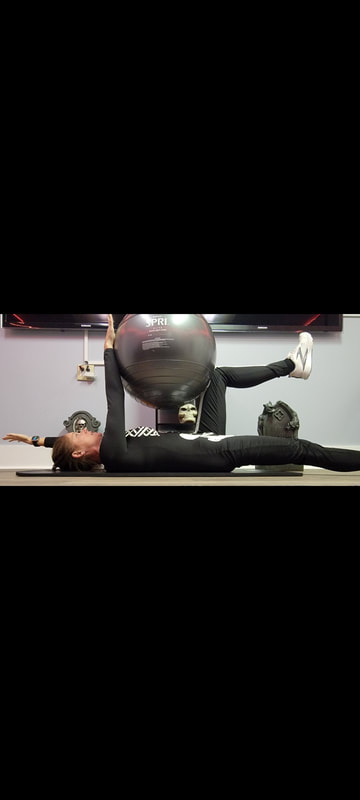
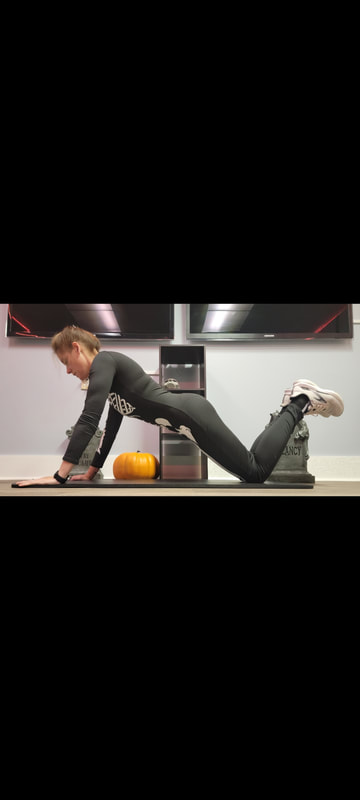
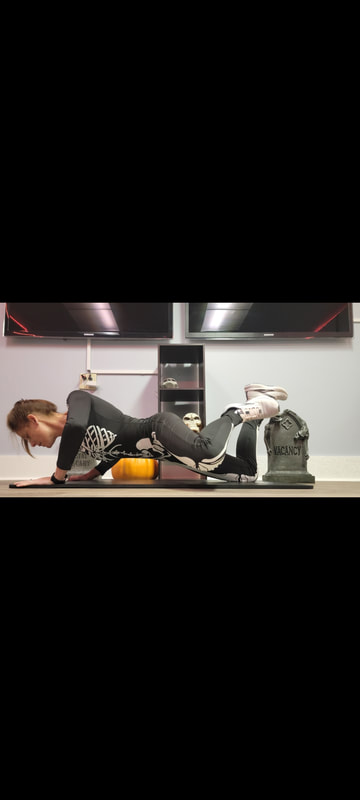
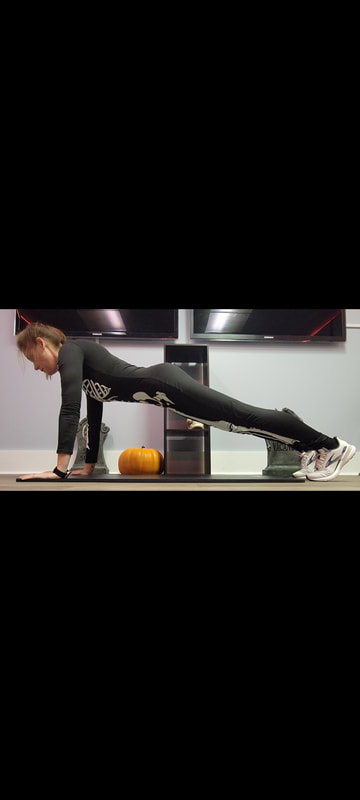
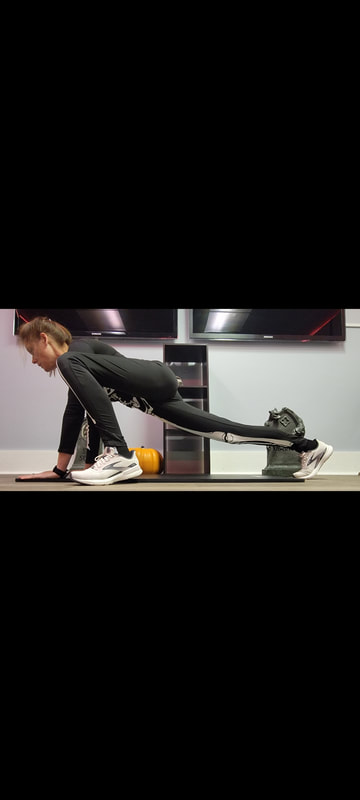
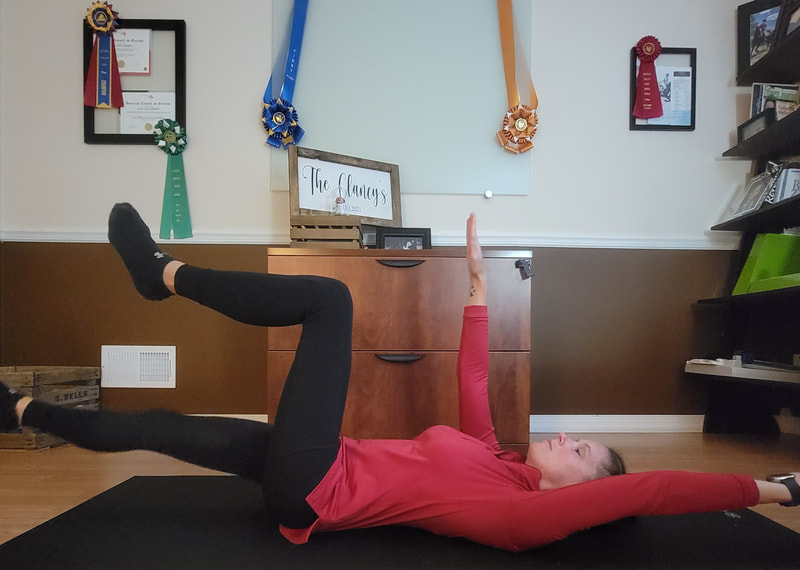
1. Start by placing the band around the ankles of both legs. 2. Soften your knees, and step one foot out to the side, then slowly step your opposite foot in the same direction. 3. Keep an upright posture, and try to avoid dragging your feet. 4. Repeat on the other side. Repeat this for 40 seconds. Once the idea for this blog came together I was wildy excited for an excuse to purchase another Halloween costume to add to my collection. I also had the perfect spot for the creation of the pictures: the spider room. Actually it's my son's game room. It might as well be a spider room because that's were a majority of the population lives. See if you can find any in the pictures below. In addition to spider searching, try theses exercises. As we already know from my blog 4 Core Exercises For Equestrians the Stability Ball Dead Bug can be performed without the Stability Ball. These 4 exercises take less than 8 minutes so you can sneak them into your scary busy schedule. As always, any questions just DM Me. Happy to help. Spiderman PlankInstructions: 1. Support your body off the floor, resting on your toes and elbows. 2. Raise one foot off the floor, bending at the knee bring it to your elbow while remaining in the plank position. 3. Return your foot back to starting position. 4.Repeat on the other side. Alternate sides with each rep. Repeat 13 times. Stability Ball Dead BugInstructions: 1. When performing this exercise, you'll want to keep your abdominal pulled in. Belly button to your spine! 2. If you have a small towel, place it under your lumbar spine. This will help you maintain neutral spine and give you something to push against while performing the exercise. 3. Begin lying on your back while squeezing the ball between your knees and your arms. This will be your starting position. 4. Initiate the exercise by extending one leg, straightening the knee and hip to bring the leg towards the ground. Only go as far as you can to maintain your back against the ground. And move the opposite hand towards the ground above your head. 5. Your lumbar position must be maintained against the towel throughout the exercise. 6. Keep your abdominals drawn in and tight, and return the moving leg and arm to the starting position. Repeat 13 times on each side. Spiderman Push Up Instructions: 1. Start in the top position of a push up with your arms straight. 2. Bend your elbows and lower your body towards the floor while also bending one knee and bringing it to your elbow with your foot off the floor. 3. Push back up to the top position. 4. Repeat with the other leg to the other elbow. Make sure to perform one rep on one side, then switch to the other side. Repeat 13 times on each side - YES 26! Push ups!! Spiderman Lunge Instructions:
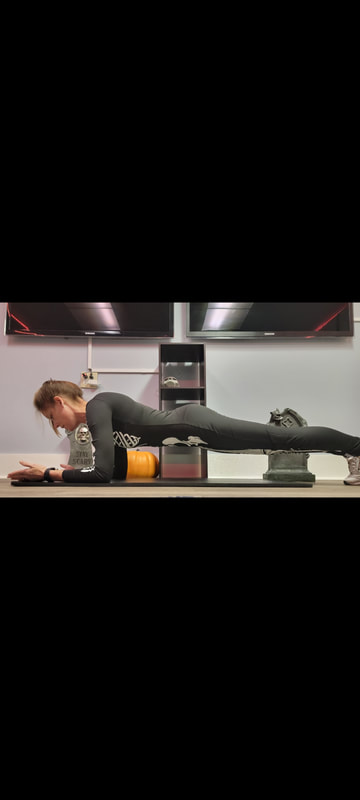
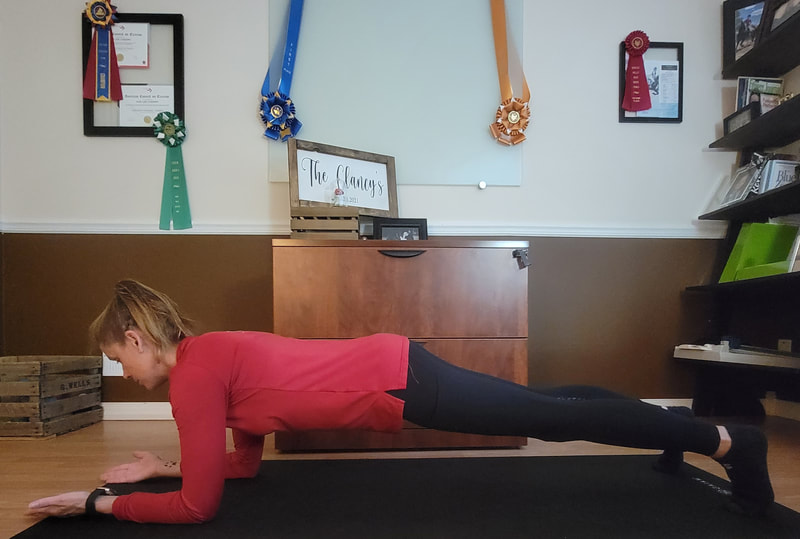
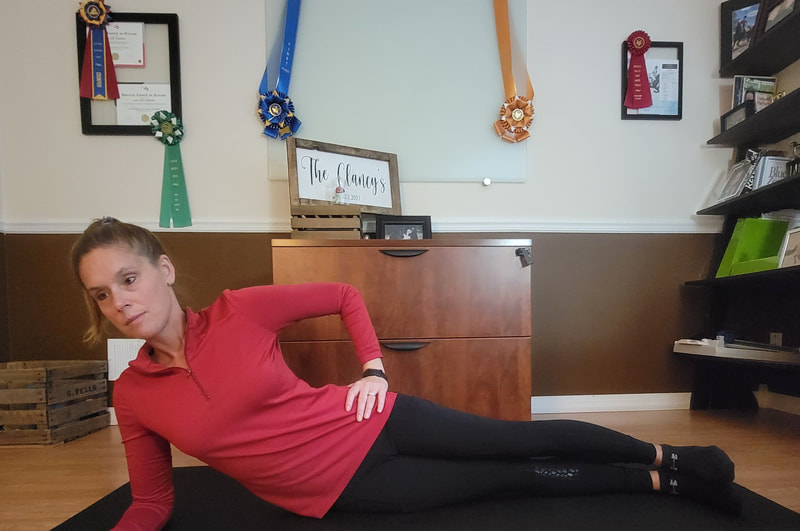
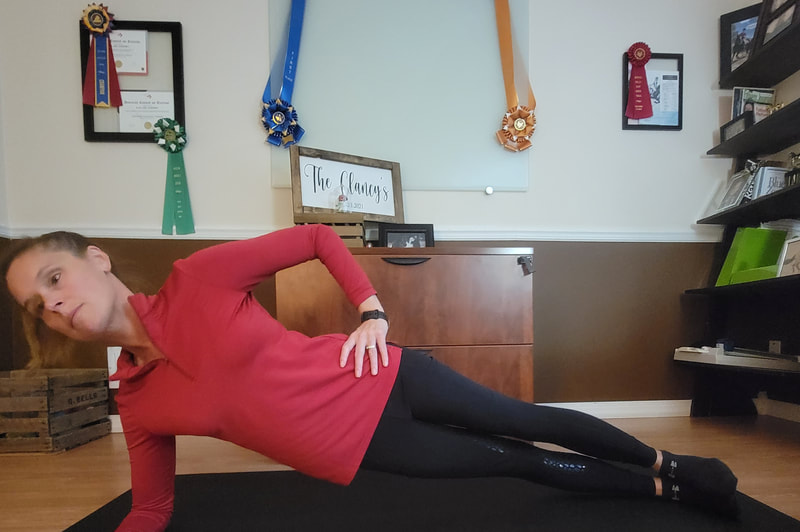
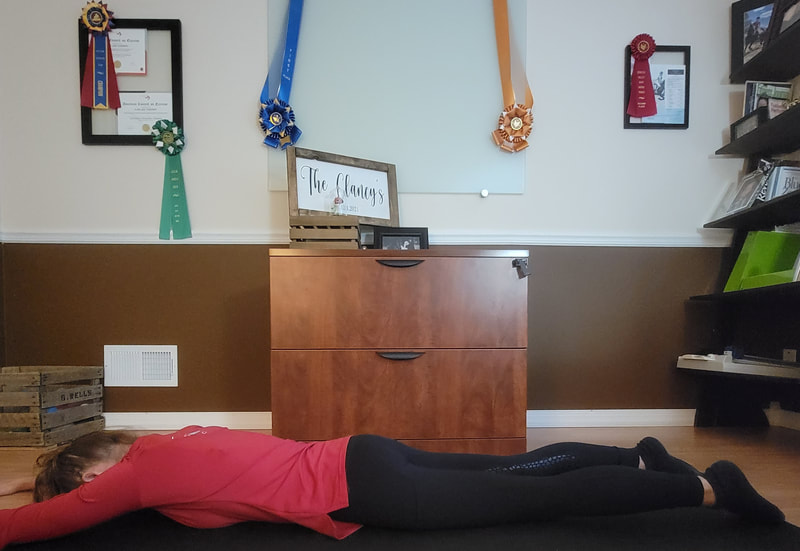
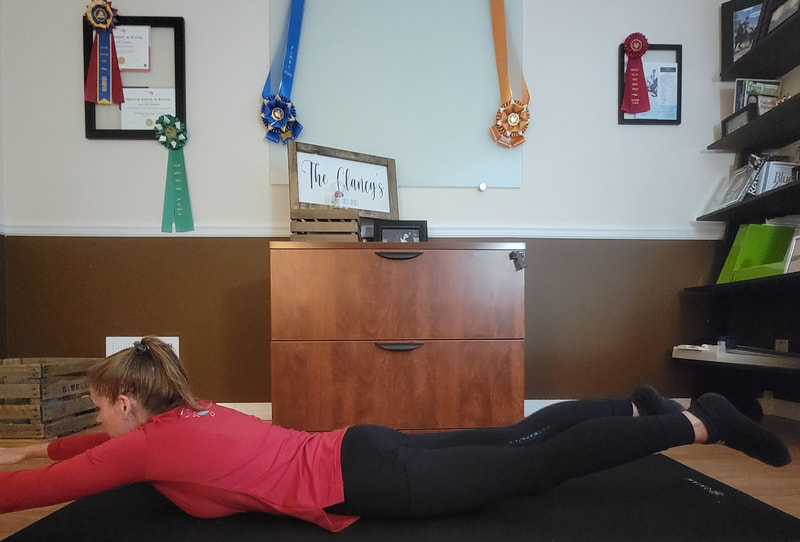
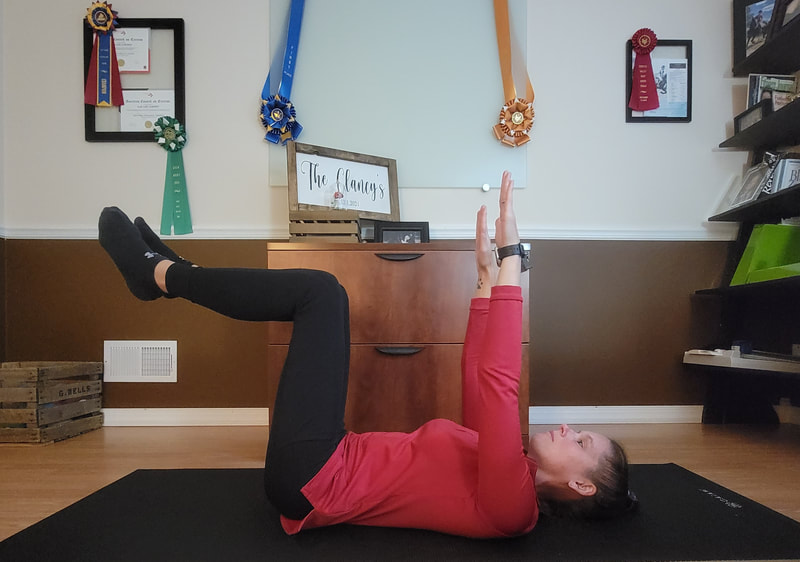
1. Start in the top position of a push up with your arms and legs straight. 2. Step one foot forward to your hand, bending at the knee, keeping the other leg straight. 3. Return to starting position. 4. Alternate sides with each rep. Repeat 13 times each side. I coach many equestrians. One of the most common weaknesses I see, whether from the casual pleasure rider or the Grand Prix dressage rider and everyone in between is a weakness in the core muscles. I have put together 4 core exercises that I highly recommend to improve your riding strength These 4 exercises take less than 8 minutes, leaving you plenty of time for barn chores. So no excuses. Any questions, or other riding issues you're having, just DM Me. Happy to help. Front PlankInstructions: 1. Lie face down on a mat with elbows resting on the floor next to your chest, palms facing up or in a fist position, feet together. 2. Push your body off the floor in a push-up position with your body resting on elbows or hands. 3. Contract the abs and keep the body in a straight line from head to toes. Hold for 30-60 seconds, then lower body returning to starting position. Repeat 2 times. Side PlankInstructions: 1. When performing the side plank, ensure that your body is in a straight line and your supporting elbow is underneath your shoulder. 2. Squeeze your glutes to keep your hips forward in line with your body. 3. Once in position and you have a nice straight line down your body, hold for 15-30 Seconds. Repeat 2 times on each side. SupermanInstructions: 1. Lie face down, legs straight, feet together, arms out straight above your head on a mat. 2.Squeeze your glutes to slowly raise your legs and arms, as well as slowly arching your back. 3.Return to starting position. Repeat 15 times. Dead Bugs |
AuthorAjia Clancy coaches YOU to self empowerment while helping you navigate life towards your health & wellness goals. Archives
July 2024
Categories
All
|
Proudly powered by Weebly





 RSS Feed